
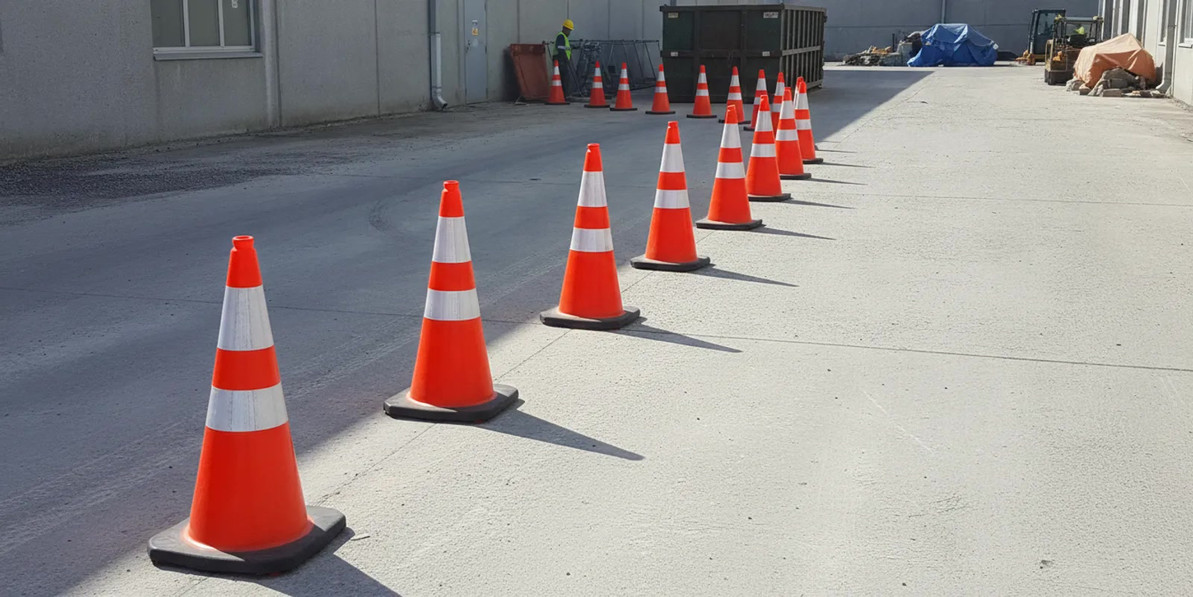
Road Cones: How to Choose the Right Ones for Workplace Safety
Road cones help safety teams separate people, vehicles, equipment, and changing work areas. The right choice depends on more than color. Buyers should assess roadway speed, visibility, placement, stability, work-zone layout, and the requirements that apply to the site. This guide gives US B2B safety managers, facility operators, construction leaders, and maintenance teams a practical way to evaluate road cones before ordering.
Call a safety equipment specialist
What job should road cones perform?
Road cones are temporary visual and physical markers. They can help identify a changing boundary, guide vehicles around an activity, protect an access point, or draw attention to a hazard. They are not a complete traffic-control plan, a substitute for trained flaggers, or a guarantee that a driver will stop.
Start by defining the job in plain language. Is the team closing a lane, marking a loading area, keeping vehicles away from a maintenance task, or directing pedestrians around equipment? The answer affects cone height, visibility features, spacing, stability, and the need for other devices.
A facility may use cones in several different environments:
- Internal roadways: Mark a temporary maintenance area, blocked aisle, or vehicle-pedestrian conflict point.
- Loading and receiving areas: Identify a restricted zone near dock doors, trailers, or moving equipment.
- Construction and utility work: Support a broader work-zone arrangement that may include signs, barriers, channelizing devices, and trained personnel.
- Emergency response: Make a sudden hazard visible while the team establishes a more durable control.
The same cone may be useful in one setting and inadequate in another. A buyer should document the use case before comparing products. That record also helps supervisors explain why a particular size or feature was selected. Write down who will deploy the cones, how long they will remain in place, and which direction traffic approaches. If the intended use changes, review the choice again rather than assuming the same setup will transfer safely.
How do size and roadway speed affect selection?
Height is one of the first specifications to review. A larger cone is generally easier to see over distance and around parked vehicles, but it may be less convenient to carry or store. A smaller cone may suit a controlled indoor or low-speed area, yet provide less conspicuity where drivers approach quickly.
Use the site's actual conditions rather than choosing by habit. Review posted speed, the speed vehicles commonly travel, sight distance, lighting, curves, grades, traffic volume, and the presence of large vehicles. A cone beside a slow internal aisle does not face the same visibility challenge as one near a high-speed roadway.
New York State Department of Transportation work-zone guidance describes traffic cones as 28 to 36 inches high. It specifies 36 inches for high-speed roads and orange cones with two white reflectorized bands for night use. Read the NYSDOT work-zone protection and traffic-control manual as a reference point, then confirm the rules and plans that govern your own jurisdiction and roadway.
That guidance should not be treated as a universal purchasing instruction for every private facility. It illustrates an important principle: traffic-control devices should be matched to exposure and operating conditions. Ask whether workers and drivers can see the cone early enough to react. Check this at night, in rain, and where equipment blocks the lower part of the device.
For example, a maintenance team closing one parking row for a brief daytime repair may prioritize a visible boundary, a clear detour, and devices that employees can carry quickly. A contractor working beside a higher-speed approach must instead verify the controlling traffic plan, advance warning, device specifications, visibility distance, and any required supplementary controls. These are different exposure profiles; a purchase should not be based on the first scenario simply because that is where the cones are most often used.
Which visibility features matter in daylight and at night?
Orange is familiar and visually distinct, but color alone is not enough. Reflective bands can make a cone more noticeable when headlights or work lights illuminate it. The number, width, placement, and condition of the bands should be reviewed against the site plan and applicable requirements.
Consider these visibility questions:
- Will the cone be used during darkness, dawn, dusk, or in a poorly lit building?
- Will headlights approach from more than one direction?
- Could dust, mud, oil, snow, or weather obscure the surface?
- Will the cone be visible above a vehicle hood or behind stored materials?
- Does the work zone need supplemental lighting, signs, barricades, or a person directing traffic?
Reflective material is not a replacement for good placement. A cone hidden behind a trailer, placed around a blind curve, or set too close to the hazard may not give a driver enough time to respond. Visibility should be assessed from the approach path, not only from the worker's position.
Make a field check at the time and from the angle people will encounter the setup. Walk the pedestrian route and view the boundary from an approaching vehicle where it is safe to do so. Check both directions if traffic can approach from either end. A cone that looks bright when a worker stands beside it may blend into a cluttered background from farther away. Repeat the check after moving vehicles, temporary storage, or lighting changes alter the view.
How should buyers compare cone stability and construction?
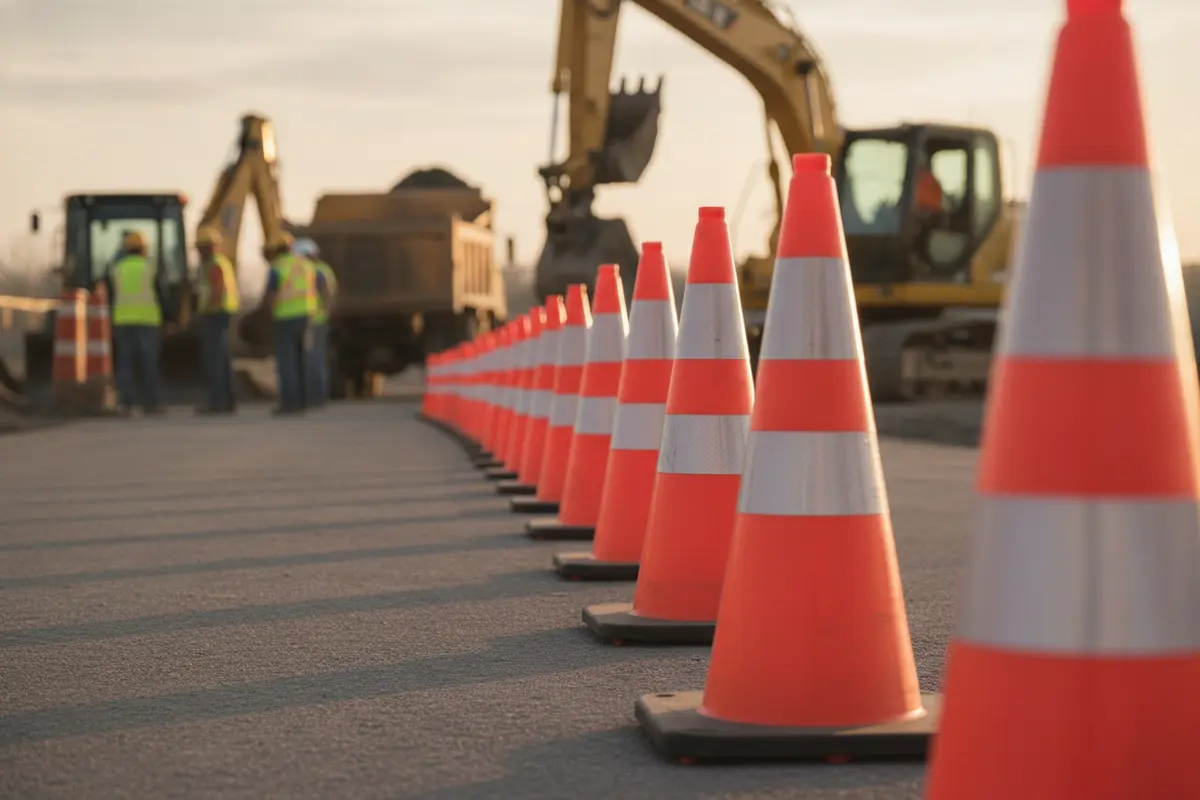
A cone needs to remain where the plan places it. Wind, vehicle wash, vibration, uneven pavement, and incidental contact can move a lightweight device. A traffic-cone design study describes the common cone as a thin-walled cone above a square hollow base and notes that the base is commonly weighted to increase stability. The academic study of stable traffic-cone design provides useful background when comparing base construction and stability.
For a buyer, the practical questions are more important than a product label:
- What base design helps the cone stand on the surfaces where it will be used?
- Will the base remain stable in the site's ordinary wind and vehicle conditions?
- Can employees carry and deploy it without unnecessary strain?
- Is the body flexible enough for incidental contact while still returning to position?
- Can the cone be cleaned, stacked, transported, and stored without damaging its reflective elements?
- Will the material remain suitable for the expected temperature, sunlight, and weather exposure?
Do not solve a stability problem by placing heavy objects on top of a cone unless the manufacturer's instructions and the traffic-control plan specifically allow it. An improvised weight can create a trip hazard, damage the cone, or become a projectile. If wind or vehicle movement routinely defeats cones, the answer may be a different device or a revised work-zone design.
Think through the full handling cycle, not just the moment of placement. A team that sets up several locations every shift may need devices that stack without sticking. They should also be easy to carry and retrieve from storage. A cone that is awkward to handle may be left behind or placed inconsistently. Conversely, a permanently staged set may allow a different balance of size, base, and storage efficiency. Ask employees who will use the equipment to test a sample and report handling problems before the order is finalized.
What should a road-cone layout include?
Buying the right device is only one part of control. The layout should tell approaching people what is changing and where they may safely travel. A supervisor should identify the approach direction, the activity area, the path around it, and any point where workers and vehicles could cross.
Before deployment, check:
- Approach distance: Place the first warning where an approaching driver or operator can see it and respond safely.
- Taper or transition: Use a clear transition when a lane or travel path changes, following the applicable work-zone plan.
- Buffer: Keep people and equipment out of the space needed for a vehicle to react or recover.
- Work area: Mark the active task without inviting pedestrians to walk through it.
- End point: Make it clear where the restriction ends and normal travel resumes.
- Accessible route: Provide a safe alternate path for pedestrians, including visitors and workers unfamiliar with the area.
Spacing should reflect speed, visibility, the geometry of the route, and the purpose of the line. A row that is too sparse may look disconnected. A row that is too dense may be difficult to move and maintain. The controlling standard, roadway authority, project plan, or site procedure should determine exact spacing where one applies.
Cones appear in many work-zone situations. The observational study of traffic-cone use is a useful reminder that teams often adapt them as conditions change. That variety makes a documented site assessment especially important.
A simple layout worksheet can make those decisions repeatable. Sketch the travel lane, the work footprint, the pedestrian path, and every approach. Mark where warning starts, where traffic changes direction, where the work boundary runs, and where the restriction ends. Then ask a person who did not design the setup to explain what it means. If the person cannot tell where to go or which side is closed, revise the arrangement before work begins.
Consider a loading-area example. A delivery truck may block the view of a maintenance crew, while forklifts continue to move nearby. A line of cones around the repair alone may not guide a driver approaching from the opposite side. It may also leave pedestrians unsure whether to cross behind the vehicle. The supervisor should account for the truck's swept path and blind spots. Establish a clear alternate pedestrian route, and add other controls if cones alone cannot define separation. Recheck the layout when the truck moves or the task expands.
Which road-cone options should a buyer compare?
A comparison table can keep a purchase focused on the actual exposure instead of a single feature. The examples below are decision categories, not a substitute for the requirements that govern a particular roadway or project.
| Use condition | Features to review | Questions before ordering |
|---|---|---|
| Low-speed indoor or controlled area | Appropriate height, stable base, easy storage | Can employees see the cone around shelving, carts, and equipment? |
| Outdoor facility roadway | Weather-suitable material, stable base, reflective bands | How will wind, rain, sunlight, and vehicle traffic affect placement? |
| Night or low-light work | Reflective elements, adequate height, clean surface | Will headlights or work lights reach the cone from each approach? |
| Higher-speed approach | Greater conspicuity and a documented work-zone layout | Does the plan provide enough warning and recovery space? |
| Frequent deployment | Stackability, carryability, durable body and bands | Can the crew inspect, transport, and replace cones efficiently? |
Road cones should be selected as part of the site's wider PPE and traffic-control process. A worker who deploys cones may also need high-visibility apparel appropriate to the task; review the high-visibility traffic safety vest with reflective strips as one example of a related product path. Eye protection, gloves, and other equipment should be based on the hazards created by the work itself, not simply on the presence of cones. Class and fit questions for that apparel belong in the separate safety vest guide on ANSI classes and fit, not in a cone purchase.
For a concrete product example, the CEP Orange Safety Cone is a 28-inch orange cone with a weighted base, sold for public-works and municipal use. Treat its height and base as one option to test against the site's speed, lighting, and storage needs, not as a default for every roadway. Where a boundary needs a tape line rather than a freestanding cone, compare barricade tape for facility maintenance as a different device.
Discuss your work-zone equipment list
How can a team inspect and maintain road cones?
Inspection is easy to overlook because cones are simple devices. A short check before each deployment and after an impact can prevent a damaged or displaced cone from weakening the work-zone message.
- Check that the body is upright, intact, and free of splits or sharp damage.
- Inspect the base for cracks, deformation, contamination, or loss of stability.
- Look for missing, peeling, dirty, or badly worn reflective bands.
- Confirm that the cone is visible from each expected approach.
- Remove cones that no longer stand as intended or cannot be cleaned effectively.
- Record replacements when the site relies on an inventory count or project checklist.
Store cones so they are not crushed, exposed to avoidable damage, or mixed with devices that have different uses. Keep a sufficient quantity at the location where the crew will need them, but avoid leaving cones in travel paths when they are not deployed. A simple inspection tag or checklist can help managers identify recurring problems such as wind movement, vehicle strikes, or poor visibility.
Make inspection actionable by assigning responsibility. Before the shift, one person can check the inventory and remove damaged devices. During work, the person supervising the area can verify that displaced cones are restored only when it is safe to do so, and that the setup still matches the plan. At closeout, the crew can account for devices and note any loss or damage. These three checkpoints help separate routine wear from a pattern that requires a change in equipment or layout.
What compliance questions should US B2B buyers ask?
Compliance begins with identifying the activity and the authority that controls it. A private facility may have a site traffic plan, while construction, utility, or public-road work may be governed by project specifications and transportation rules. OSHA requirements may also apply to worker exposure, access, visibility, and the hazards created by the task. ANSI or other referenced specifications may appear in procurement documents or employer procedures.
Ask these questions before approving a purchase:
- Which authority, project document, or employer procedure sets the requirements?
- What roadway speed, lighting, weather, and traffic conditions must the device handle?
- Are height, color, reflective material, base, or performance specifications stated?
- Does the layout need signs, barriers, lighting, flaggers, or an approved traffic-control plan in addition to cones?
- How will the employer train workers to deploy, inspect, move, and remove the devices?
- What records will show that the equipment was checked and the work area was controlled?
Do not rely on a product description alone to decide whether a setup is compliant. Confirm the governing requirement, retain relevant product information, and involve the person responsible for the site's safety plan. If the work affects a public roadway, coordinate with the applicable roadway authority before deployment.
It can help to keep a compact procurement record with the work location, intended task, responsible supervisor, controlling document, required device features, and inspection expectations. This is not a substitute for a formal plan where one is required. It does make it easier for a later buyer or shift lead to understand why a particular configuration was approved. It also shows when changed traffic or operating conditions make that decision outdated.
How can a team put a road-cone decision into practice?
A repeatable process reduces rushed purchases and inconsistent deployment. First, map the work area and list every approach by vehicle and pedestrian traffic. Next, document speed, lighting, weather, surface, storage, and expected duration. Then identify the applicable requirements and select a cone configuration that meets the documented exposure.
Run a small field check before buying a large quantity. Place sample devices at the planned approach points. View them from a driver's eye level, in the lighting expected during the work, and from the pedestrian route. Check whether the base stays in position and whether workers can move, stack, and store the cones as planned.
For example, suppose a maintenance crew expects to use cones in two locations: an indoor aisle and an outdoor service road. Do not assume that one configuration automatically suits both. Compare the aisle's sightlines and cart traffic with the road's speed, lighting, weather exposure, and vehicle movement. The team may decide that one device works in both places, or it may document separate requirements and keep the equipment clearly assigned. Either way, test the decision in the environment instead of inferring performance from a catalog description.
Finally, write the deployment steps into the job briefing. State who sets the first warning device, who verifies spacing and access, who watches for changes, and who removes the cones. Reassess the layout when traffic, weather, work location, or visibility changes.
When the same crew also faces construction hazards beyond traffic, keep cone selection separate from the rest of the PPE program. The construction PPE guide for site safety covers that broader equipment review. If the task creates an eye hazard, review dedicated 3M safety eyewear on its own, based on the impact or splash exposure, not because cones are present.
For longer projects, define review triggers before work begins. A move to night work, a changed detour, a new vehicle type, severe weather, or a larger work area should prompt a fresh check. The supervisor can pause the task when the cones no longer communicate a clear route, then restore work only after the layout and any supporting controls are reviewed.
A useful final test is to ask a worker who did not set the cones to explain the route and boundary. Have the worker describe where vehicles should travel, where pedestrians should walk, and where the hazard begins. If the answers differ from the plan, the arrangement needs clarification. Document what changed, brief the team, and inspect the devices after repositioning them.
Get help reviewing your safety equipment needs
Frequently Asked Questions
Are road cones enough to protect a work area?
No. Cones communicate a temporary boundary, but they do not replace a complete traffic-control plan, physical barriers where needed, signs, lighting, trained traffic direction, or task-specific PPE. Select the controls based on the hazard and the people and vehicles exposed.
What color should road cones be?
Orange is the familiar color for traffic cones and is identified in the NYSDOT reference linked above. Confirm the color, height, reflective features, and other specifications required by the roadway authority, project, or site procedure that governs the work.
Do reflective bands make a cone compliant?
Not by themselves. Reflective bands can improve visibility in low light, but compliance depends on the complete device, its placement, the work-zone layout, and the applicable requirements. Inspect the bands and keep them clean and intact.
How many road cones does a worksite need?
There is no single number for every site. Count the approach warnings, transitions, work-area boundary, pedestrian route, and end point described in the plan. Add an inventory allowance for replacement, relocation, or a second shift when the work is expected to change.
How often should road cones be inspected?
Inspect them before deployment, after vehicle contact or severe weather, and during the work whenever conditions change. Remove damaged, unstable, dirty, or poorly visible cones and replace them before reopening the area to traffic.
The best road-cone decision matches the device, layout, inspection routine, and worker training to the actual conditions of the US worksite.
Recent Posts
-
Road Cones: How to Choose the Right Ones for Workplace Safety
Road cones help safety teams separate people, vehicles, equipment, and changing work areas. The righ …Oct 28th 2026 -

Buying and Using Safety Harness Inspection Checklist at Work
A safety harness inspection checklist helps workplace teams identify visible damage, confirm equipme …Oct 26th 2026 -

Drum Spill Containment Pallet: a decision guide for employers
A drum spill containment pallet helps a workplace collect leaks or spills beneath stored drums inste …Oct 26th 2026