
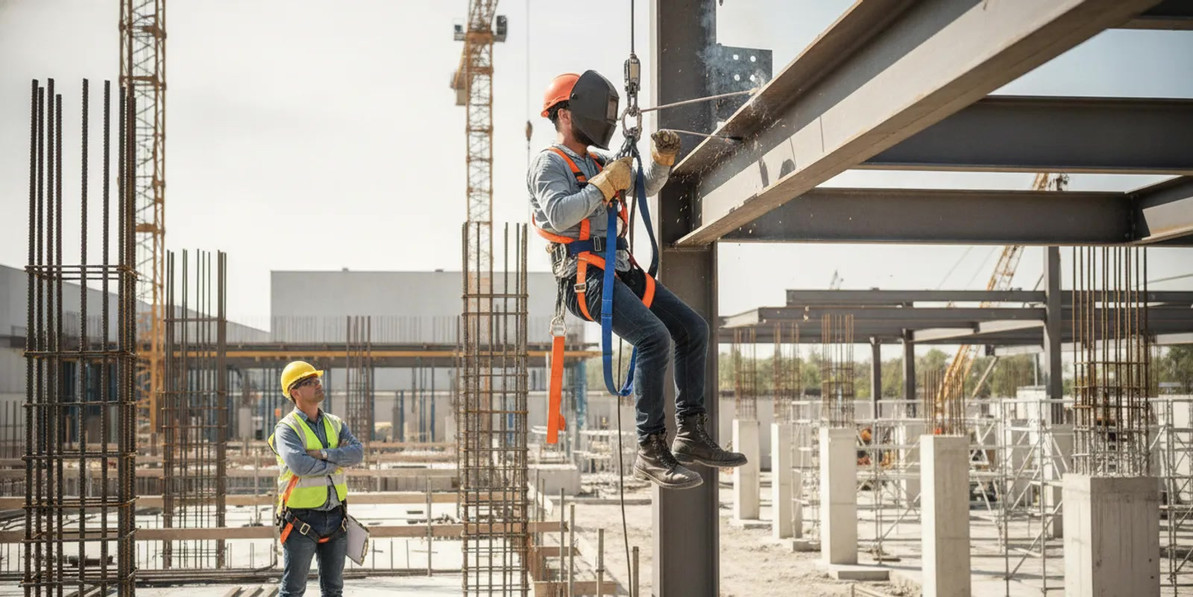
How to Properly Wear a Safety Harness
Knowing how to properly wear a safety harness is only one part of protecting workers at height. The harness must match the fall hazard, fit the wearer, connect to compatible equipment, and be used under a site-specific fall-protection plan. For employers and safety buyers, the goal is to verify the entire system—not simply issue a harness.
Talk with a safety equipment specialist
What does a safety harness do—and what does it not do?
A full-body harness is a body-support component of a personal fall-arrest system. When a fall occurs, the system is intended to distribute arrest forces across the body and keep the worker suspended after the fall is arrested. It does not prevent a fall by itself. The complete system also depends on suitable connecting equipment, an appropriate anchorage, compatible components, and a rescue plan.
Keep three fall-protection functions distinct when evaluating equipment:
- Fall prevention: Guardrails, travel restraint, or other controls may keep a worker from reaching a fall hazard, depending on the task and applicable requirements.
- Fall arrest: A personal fall-arrest system arrests a fall after it begins. This requires a compatible harness and system components.
- Work positioning: Equipment may support a worker in position for a task, but positioning equipment should not be assumed to provide fall arrest unless the configuration and instructions establish that function.
Start with the hazard assessment and applicable OSHA requirements for the work, industry, and location. Do not assume that any harness, lanyard, or anchor is suitable for every job. OSHA describes safety management as a process that includes identifying hazards, implementing controls, and evaluating results: OSHA safety management guidance.
How should a buyer choose a harness for the task?
Before ordering, document the work activity, the potential fall exposure, and the equipment that workers will use together. A harness is not selected by size alone. Consider the wearer, attachment configuration, environmental conditions, task duration, and the instructions for all connected components.
- Define the task and hazard. Identify where workers can fall, the working height, edges or openings, possible swing-fall exposure, and obstructions below. Include how workers reach and leave the work area.
- Confirm the protection method. Determine whether the work calls for prevention, restraint, positioning, or fall arrest. Select the approach based on the hazard assessment and applicable requirements, not convenience.
- Check compatibility as a system. Review the harness, connector, energy-absorbing element or self-retracting device, and anchorage together. Follow each manufacturer’s instructions and verify that the intended connection and use are permitted.
- Account for the wearer and work clothing. Choose a harness size and configuration that can be adjusted to the user and worn over the clothing and other PPE expected for the job. Consider whether tools, a respirator, or protective clothing affect movement or access to adjustment points.
- Plan for clearance and rescue. Calculate the system’s required clearance using the connected equipment’s instructions and the actual work geometry. Establish how a suspended worker will be rescued promptly; do not treat emergency response as an afterthought.
- Verify training and records. Confirm that workers are trained for the equipment and task, and that inspection, maintenance, and removal-from-service practices are defined.
For example, a worker installing equipment near an edge may need a different setup from a worker who must move along a structure. If an anchor is offset, a fall may involve a swing path or contact with a lower level or structure. The buyer should review those conditions with the competent safety personnel and the equipment instructions before authorizing work.
A useful procurement exercise is to describe one real job from start to finish. Note the approach to the work area, the points where the worker must lean or turn, where tools will be carried, and the route back to a safe area. A harness that seems suitable while standing still may become restrictive when the worker needs to reach across a surface or move through an opening. Use those observations to define adjustment, attachment, and mobility needs before comparing products.
What should a properly fitted harness look like?
A harness should be adjusted to the worker according to its label and manufacturer instructions. A loose or twisted fit can affect how the harness performs, while overly tight adjustment can restrict movement or discourage proper use. There is no universal fit setting that replaces the product instructions and hands-on training.
Use the following as a practical pre-use fit sequence, while following the exact instructions for the specific model:
- Identify the harness and inspect it first. Confirm its label and intended use are legible. Check webbing, stitching, hardware, buckles, and attachment points for damage, contamination, wear, or signs of an event that requires removal.
- Hold it by the back attachment point. Allow the straps to fall into position and untangle them. Identify shoulder straps, leg straps, chest strap, and buckles before putting it on.
- Put on the shoulder straps. Place the harness over the shoulders as directed, ensuring the straps are not twisted and the back attachment point is correctly positioned.
- Fasten and adjust the leg straps. Connect the buckles as specified by the model. Adjust both sides evenly so the harness is secure without restricting normal movement. Do not leave a buckle partially engaged.
- Position and fasten the chest strap. Place it at the location specified in the instructions, connect it fully, and adjust it so the shoulder straps remain correctly positioned.
- Check all adjustment points. Tighten or secure loose strap ends as instructed. Recheck that no strap is twisted, buckles are properly connected, and the harness sits evenly.
- Perform a movement check. Walk, bend, and reach as the job requires. The harness should remain adjusted and should not interfere with the work or other required PPE. If the fit shifts or a component conflicts, stop and resolve the issue before exposure to a fall hazard.
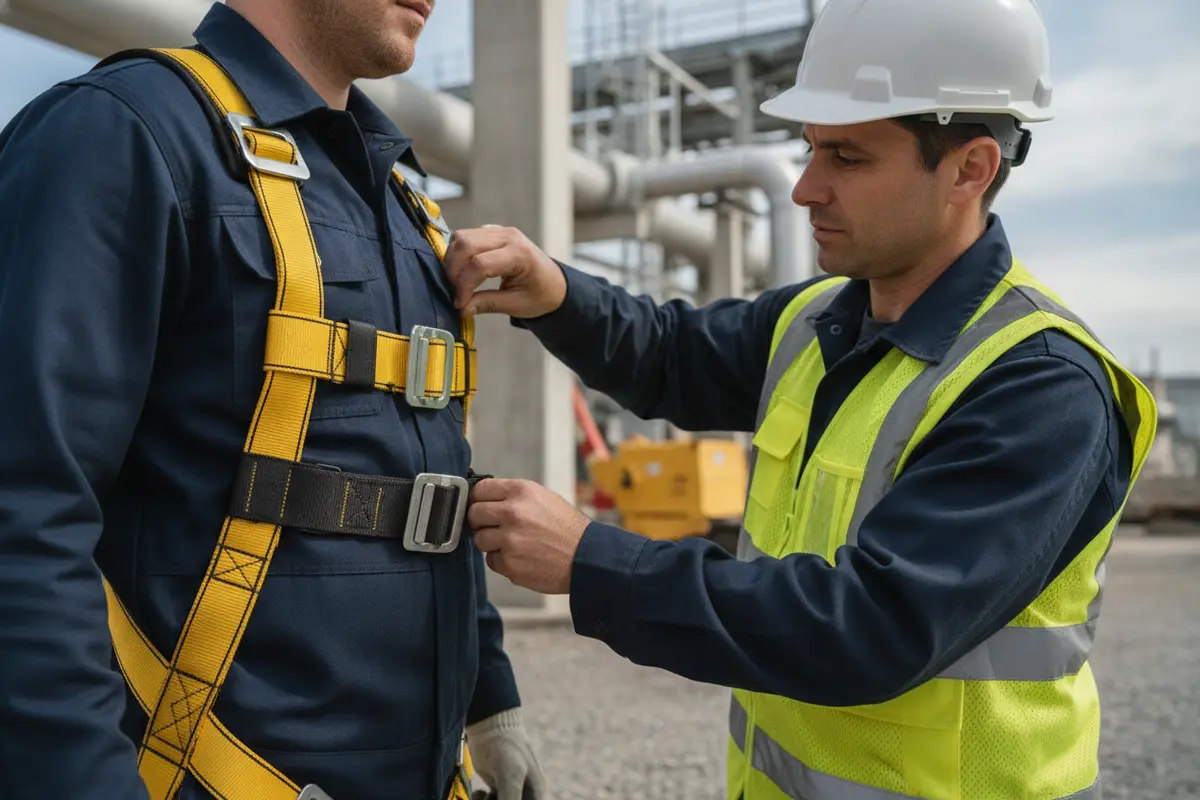
Have the worker perform the final check after fitting, with a trained person available to correct problems. A buddy check can help catch twisted straps or open buckles, but it does not replace training, inspection, or the manufacturer’s instructions. Do not alter, knot, sew, or otherwise modify harness webbing or hardware.
Fit should also be checked with the clothing and PPE that will actually be worn. A jacket added for cold conditions, a tool belt, or another item of protective equipment can affect strap routing and movement. Ask the wearer to rehearse the planned tasks at ground level: reach, crouch, turn, and use tools as applicable. If a strap catches, a buckle is difficult to reach, or the harness rides out of position, correct the issue before the worker goes aloft. Fit checks should be repeated when the user, clothing, equipment, or task changes.
How do inspection and connection affect safe use?
A visually sound harness can still be unsuitable if it has been exposed to a fall, damaged, altered, contaminated, or used outside its instructions. Before each use, inspect the complete equipment configuration according to manufacturer directions and the employer’s program. If the history or condition is uncertain, keep it out of service until a qualified person determines the next step.
Check these areas during a pre-use inspection:
- Webbing: Look for cuts, tears, fraying, abrasion, burns, chemical damage, excessive wear, or other deterioration.
- Stitching: Check load-bearing seams for broken, pulled, or damaged stitches.
- Hardware: Look for cracks, distortion, corrosion, sharp edges, or parts that do not operate as intended.
- Buckles and adjusters: Confirm they connect, adjust, and remain secured according to their instructions.
- Labels and markings: Ensure information needed to identify and use the equipment remains readable.
- History: Check whether the equipment has arrested a fall or been subjected to an event requiring it to be removed from service.
When connecting the system, use only the attachment point and configuration specified for the task. The dorsal attachment point is commonly used for fall arrest, but the correct point depends on the equipment and its instructions. Never connect to a point simply because it is convenient. Inspect the connector and anchorage, confirm the connection is secure and compatible, and prevent contact with sharp edges or other hazards that could compromise the system.
Anchorage selection is a critical part of system design. The anchor must be appropriate for the intended loading and installed or selected by a person with the required competence under the applicable rules and system instructions. A visually strong beam or handrail is not automatically an approved anchorage. The employer should ensure the anchorage and connecting equipment are evaluated as part of the full setup.
Inspection is most useful when the process has a clear outcome. If a worker finds damage, a missing label, or uncertain equipment history, the next action should be obvious: stop, separate the item from ready-to-use equipment, mark or otherwise identify its status, and report it to the person responsible for equipment decisions. Do not let a questionable harness return to a shared storage area where another worker may assume it is cleared. Recordkeeping procedures should reflect the employer’s program and the manufacturer’s guidance; a checklist cannot make damaged equipment safe.
Connection checks deserve the same attention. Confirm that the connector is fully closed and locked as instructed, that the connection is made to the intended attachment point, and that the arrangement does not create an incompatible or unintended loading condition. Review the actual path of movement, not only the initial position. A setup that appears clear at the platform can become hazardous if the worker moves laterally or the anchor lies well to one side.
Which checks help compare harness options?
Buyers can use a comparison table to keep the procurement decision tied to the work. A product feature is not proof of compliance by itself. Verify model-specific details in product labeling and manufacturer documentation, and have the responsible safety professional approve the configuration.
| Decision area | What to verify | Why it matters |
|---|---|---|
| Work task and hazard | Fall exposure, movement, edge conditions, swing-fall risk, and obstacles below | Establishes the protection method and system arrangement to evaluate |
| Harness fit | Available size range, adjustment, wearer comfort, and compatibility with expected clothing and PPE | A harness must be adjusted and worn correctly to serve its intended role |
| Attachment configuration | Approved attachment points and intended use in the manufacturer instructions | Prevents selecting a configuration that does not match the task |
| Connected components | Connector, lanyard or device, anchor, and permitted connections | Compatibility and system performance depend on the complete setup |
| Clearance and rescue | Required fall clearance, potential swing path, and rescue method | Helps address hazards after a fall is arrested |
| Inspection and training | Inspection criteria, equipment history, training, and removal-from-service process | Supports consistent use and prevents questionable equipment returning to service |
For product research, examine harnesses and connected equipment as a system rather than purchasing a component in isolation. Relevant options may include a full-body harness, a cross-arm anchorage strap, or a self-retracting line. These examples are not a recommendation that the items are compatible with one another or suitable for a particular job. Verify each product’s instructions and get the system reviewed before use.
When comparing two candidate harnesses, use the same job scenario for both. Ask whether each can be fitted to the intended users, whether its attachment configuration supports the planned equipment arrangement, and whether its instructions address the work environment. Then compare inspection requirements, labels, adjustment features, and documentation access. A longer feature list does not necessarily make one option better. The better candidate is the one that fits the assessed task and can be correctly used, inspected, and supported by the employer’s program.
Procurement teams can make the review more consistent by recording the decision rather than relying on memory. A simple worksheet can list the task, user group, equipment combination reviewed, documentation checked, and open questions sent to the safety lead. For example, if one team works from a fixed platform and another moves along a structure, record them as separate applications. This prevents a purchase approved for one condition from being treated as a universal solution for every elevated task.
What workplace limits and compliance issues matter?
Fall-protection obligations depend on the work activity, industry, site, and applicable federal or state requirements. Employers should consult the standards that apply to their operations and use competent safety personnel to evaluate the work. OSHA’s guidance on safety management emphasizes identifying hazards, implementing controls, and checking whether the approach is effective; its safety and health program self-evaluation tool likewise describes systematic hazard evaluation using available information.
A harness cannot compensate for an unsafe or incomplete plan. Common problems include:
- Using fall arrest where prevention is feasible and required. Evaluate whether guardrails, restraint, or another control can keep workers from exposure.
- Ignoring clearance. A worker can strike a lower level or obstruction before a system arrests the fall if the required clearance is not available.
- Overlooking swing hazards. A worker may swing into a structure when the anchor is not positioned in relation to the work as planned.
- Using incompatible components. Do not assume connectors, harnesses, and anchors work together based on appearance or brand alone.
- Skipping rescue planning. A suspended worker may need prompt rescue. Identify the method, responsibilities, and necessary resources before work begins.
- Continuing after an equipment event. Follow manufacturer instructions and site procedures for equipment involved in a fall or suspected damage; do not return it to service casually.
- Relying on the harness as a substitute for training. Workers need instruction and practice relevant to their equipment, task, and emergency procedures.
Written procedures should tell workers who may authorize the setup, how to inspect and document equipment, what to do if a defect is found, and how to report changes in the task or work area. A change in anchor location, access method, or equipment can change the risk. Reassess rather than assuming that the original plan still fits.
Training should connect the equipment steps to the work itself. Workers need to know which attachment configuration the plan calls for, which conditions require stopping, how to report a defect, and who can approve a changed setup. Supervisors should make sure workers can demonstrate adjustment and connection rather than treating a signed attendance sheet as proof of competent use. The precise training and program requirements depend on the applicable rules and employer procedures.
Rescue planning also needs to be specific. Identify who will initiate the response, what resources will be available at the worksite, how responders can reach the worker, and how the team will communicate. A general instruction to call emergency services does not describe the site’s complete rescue arrangements. Review the plan with the people who would carry it out, and revisit it if access, staffing, or work location changes.
Review full-body harness options
How can a buyer put the decision into practice?
Turn the assessment into a repeatable purchasing and deployment process. A checklist makes it easier to compare options and to pass critical information from the buyer to the safety lead, supervisor, and worker.
- Record the job conditions. Note the task, work location, exposure, access route, duration, and anticipated movement.
- Document the required system. Identify whether the plan uses prevention, restraint, positioning, or arrest and list the required components.
- Obtain the product documentation. Confirm intended use, size and adjustment range, attachment points, inspection criteria, and limitations from the manufacturer.
- Check fit with actual users. Confirm that intended workers can wear and adjust the harness with their normal work clothing and PPE. Resolve any fit or mobility concern before deployment.
- Review the full connection and clearance. Have the responsible safety person check anchor location, connectors, equipment compatibility, clearance, and possible swing path.
- Set inspection, storage, and rescue procedures. Make responsibilities clear and ensure workers know what to do if an inspection fails or a fall occurs.
- Revisit the choice when conditions change. New tasks, workers, access routes, anchors, or connected equipment may require a fresh review.
Procurement and field approval are related but separate decisions. A buyer can identify candidate equipment, confirm documentation, and ensure that appropriate choices are available. The employer’s safety process must still determine whether a specific setup meets the work requirements and can be used safely by trained workers.
A practical handoff can be organized around three documents: the hazard assessment, the product instructions for each component, and the site’s use and rescue procedures. The buyer should not interpret a product listing as approval for an installation. Instead, provide the safety lead with the candidate model information and the job description, and ask which unresolved details need confirmation. Before the first shift, the supervisor can brief workers on the approved configuration, inspection expectations, and stop-work triggers.
After deployment, collect feedback from workers and supervisors. Ask whether the equipment remains correctly adjusted during the task, whether access or movement causes recurring problems, and whether storage and inspection steps are practical. Feedback does not replace a formal hazard review, but it can expose usability issues that were missed during purchasing. If the task or equipment changes, route the change through the same review process instead of letting an informal substitution become the new normal.
Keep the decision focused on protection and permitted use. A lower purchase cost, familiar brand, or convenient attachment point cannot resolve a mismatch between the harness and the job. Document why the chosen setup meets the defined need, what conditions would require another review, and who is responsible for authorizing field use. That record helps purchasing, safety, and operations teams work from the same assumptions.
Frequently Asked Questions
How tight should a safety harness be?
Adjust the harness according to the model’s instructions so it is secure and properly positioned without restricting normal movement. Do not rely on a universal rule or a fit check from a different harness model. If the harness shifts, pinches, or cannot be adjusted as directed, stop and resolve the fit issue before work.
Can a worker connect a lanyard to any harness ring?
No. Use only the attachment point and configuration specified for the equipment and task. Attachment points may have different intended functions, so check the harness and connecting-device instructions and have the setup reviewed by the responsible safety professional.
Should a harness be reused after arresting a fall?
Do not put equipment involved in a fall back into service without following the manufacturer’s instructions and the employer’s removal-from-service process. Isolate and identify the equipment so it cannot be used inadvertently while its status is being resolved.
Does wearing a harness mean the work is compliant?
No. Compliance depends on the applicable requirements and the complete work arrangement, including hazard assessment, suitable equipment, proper use, training, inspection, anchorage, clearance, and rescue planning. A harness alone does not establish that a fall-protection plan is adequate.
What should a buyer do if workers need different harness sizes?
Check the manufacturer’s size and adjustment guidance against the actual users and expected clothing. Provide suitable options for the workforce and make sure each worker can properly adjust and inspect the assigned equipment. Do not assume one size or configuration will fit everyone.
Choosing a harness is a system decision that starts with the work hazard and ends with trained, equipped workers using an approved setup. Verify fit, instructions, compatibility, clearance, inspections, and rescue arrangements before anyone relies on the equipment at height.
Recent Posts
-

How to Properly Wear a Safety Harness
Knowing how to properly wear a safety harness is only one part of protecting workers at height. The …Oct 23rd 2026 -

Safety Harness for facility and field teams
A safety harness is one part of a fall-protection decision, not a stand-alone answer to every work-a …Oct 22nd 2026 -
Ear Protection: Plugs, Muffs, and Communication
Choosing ear protection for a workplace is not just a matter of picking the product with the highest …Oct 21st 2026