
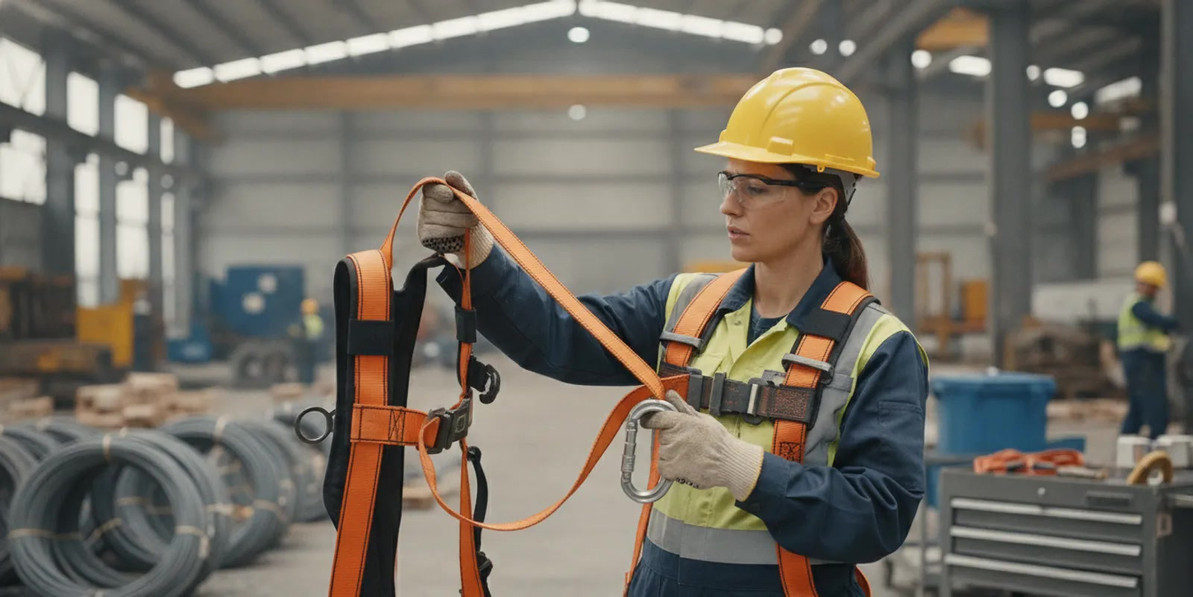
Buying and Using Safety Harness Inspection Checklist at Work
A safety harness inspection checklist helps workplace teams identify visible damage, confirm equipment identity, and decide when a harness must be removed from service. For safety managers, the checklist is one part of a larger fall-protection program: workers still need equipment suited to the hazard, correct fit, compatible connections, and training for the task.
Review a full-body harness option
What should a safety harness inspection checklist cover?
Use a consistent sequence rather than relying on a quick glance. Inspect the whole assembly in good light, follow the manufacturer’s instructions, and compare observations with the harness label and applicable program requirements. A checklist supports an inspection; it does not replace training or the manufacturer’s criteria.
- Identify the equipment. Confirm the harness can be identified and that its label is legible. OSHA’s harness inspection guidance notes that each harness must have a legible tag identifying the harness and model, manufacture date, manufacturer, limitations, and warnings.
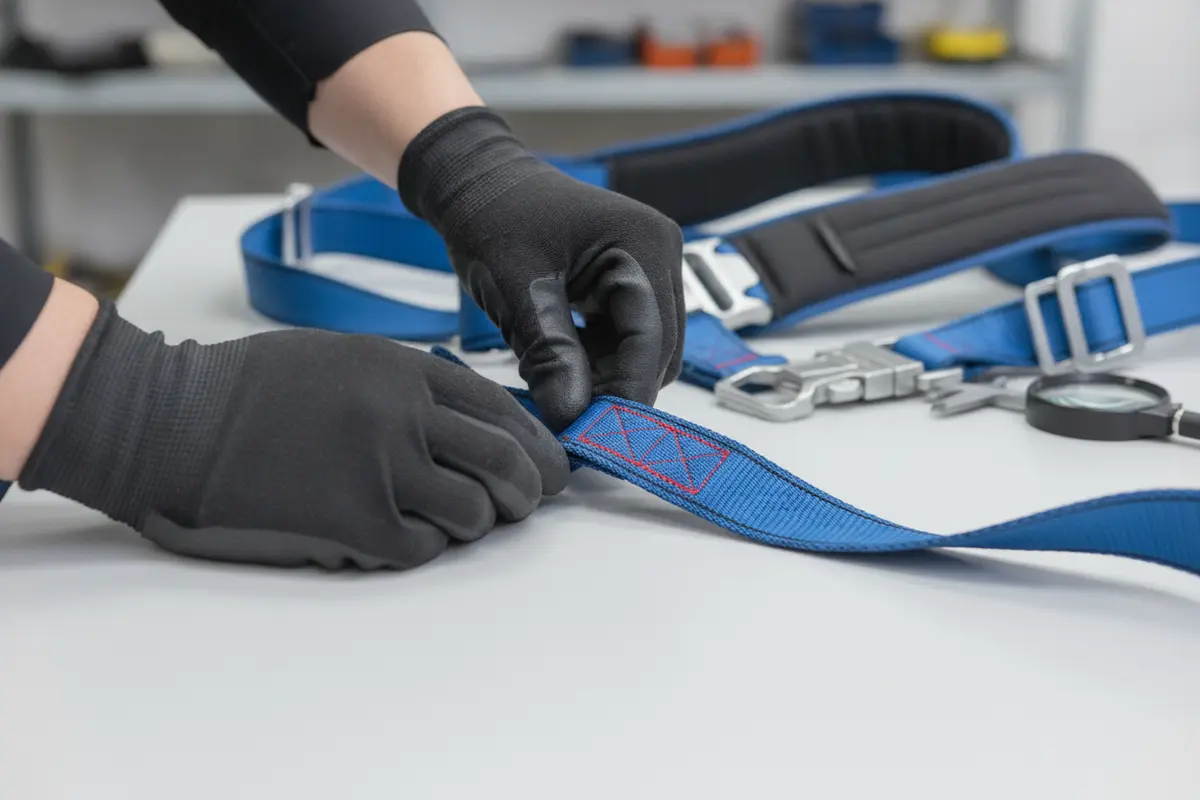
- Check webbing and stitching. Examine each strap along its full length for cuts, tears, fraying, abrasion, burns, chemical damage, discoloration, stiffness, or other change. Look closely at stitched areas and load-bearing seams for broken, pulled, or missing stitches.
- Inspect hardware. Check buckles, rings, adjusters, and other metal or plastic parts for cracks, distortion, corrosion, sharp edges, loose parts, or function that does not match the manufacturer’s instructions. Confirm buckles engage and adjust as designed.
- Review connectors and accessories. Inspect attachment points and any compatible lanyard or lifeline separately, using that product’s own inspection criteria. A sound-looking harness does not establish that the complete system is compatible.
- Check fit and adjustment. Confirm the harness is the correct size and can be adjusted to the wearer without twisted straps or obstructed components. Follow the maker’s fitting instructions and your site’s training.
- Decide and document. Record the result according to the employer’s procedure. If any condition is uncertain, isolate the harness and seek a competent, authorized evaluation rather than returning it to use by assumption.
The order matters because an inspector can otherwise spend time examining straps without first confirming which instructions apply. A model number, manufacturing date, and warning label help connect the physical item to the correct documentation. If the label is missing or unreadable, do not guess the model from color, shape, or a coworker’s recollection. Treat the identification problem as a decision point that requires the employer’s procedure and, when appropriate, manufacturer assistance.
It is also useful to separate observations from conclusions. “One edge of the shoulder strap is frayed for approximately two inches” is a useful finding. “Looks fine” is not. A checklist should give the inspector enough space or structure to record the condition, the action taken, and the person responsible for the next step.
How should a buyer decide what belongs in the inspection?
Start with the manufacturer’s label, instructions, and the employer’s written fall-protection procedures. Inspection frequency and specific checks depend on the equipment and the work. Users should inspect before use as required by the applicable instructions and rules; a designated competent person should carry out additional inspections on the schedule established by the manufacturer and the employer’s program.
Build the checklist around the actual assembly, not a generic product image. A harness may be used with a rope lifeline assembly or other connection, but each component has its own limitations and inspection points. Verify the system’s compatibility and intended use in the product documentation before selecting it.
For each model, list the points an inspector must see and the result that requires action. This can include label information, strap paths, stitching patterns, energy-absorbing components, attachment points, buckles, and indicators specified by the manufacturer. A model-specific supplement is more useful than a generic form that simply says “pass.”
Consider who will use the form and where. A worker inspecting equipment beside a trailer may need a short, durable checklist with clear stop-use instructions. A safety manager conducting a periodic review may need room to record serial information, detailed findings, corrective action, and follow-up. The same program can use both formats if the fields and decisions remain consistent.
| Inspection area | What to verify | Action if it fails |
|---|---|---|
| Identity and label | Legible model, manufacturer, date, limitations, and warnings | Do not use unidentified equipment; consult employer and manufacturer guidance |
| Webbing and stitching | No cuts, fraying, burns, chemical damage, or damaged seams | Remove from service for evaluation or disposal under procedure |
| Hardware | No cracks, distortion, corrosion, sharp edges, or malfunction | Quarantine; do not repair unless the manufacturer expressly permits it |
| Fit and adjustment | Correct size, secured closures, adjusted straps, no twists | Correct fit or select an appropriate harness before work |
| System connection | Compatible components and approved attachment configuration | Stop and verify the system instructions and work plan |
What should an inspector look for on webbing and stitching?
Handle and examine every section of webbing, including portions hidden by keepers or folded through buckles. Look for edge damage, pulled fibers, melted areas, hard or glazed sections, embedded material, stains that may indicate chemical exposure, and changes in width or texture. Damage may be easier to notice when the strap is flexed gently according to the manufacturer’s instructions, but do not stretch, cut, or manipulate equipment in a way that could worsen its condition.
Inspect stitching where straps join, around attachment points, and at labels or other sewn areas. Broken, loose, missing, or pulled threads can change the strength of the assembly. Do not treat a small defect as harmless simply because the rest of the webbing looks clean. Compare the harness with the manufacturer’s acceptance criteria and remove it from use when the condition is outside those criteria or cannot be confidently evaluated.
Pay attention to changes caused by the work environment. A harness used around welding or hot work may need careful review for heat or molten-metal damage. Equipment exposed to solvents, acids, caustics, paint, or other chemicals may show discoloration or stiffness, but a normal-looking surface does not prove that exposure had no effect. Record the substance and exposure circumstances when known, then follow the manufacturer’s instructions instead of relying on a visual guess.
Contamination can also affect handling and inspection. Dirt can hide a cut, while an oily surface can make a strap feel different from its original condition. Clean only with methods allowed by the manufacturer. Never use an inspection routine as a reason to scrub, soak, alter, or dry a harness in a way that could damage the fibers or hardware.
How do hardware and attachment points change the inspection?
Move through each buckle, adjuster, ring, and attachment point deliberately. Check for cracks, bent or distorted parts, corrosion, sharp edges, missing pieces, and fasteners that do not appear secure. Operate a buckle only as directed by the manufacturer. It should engage, adjust, and release in the intended way; resistance, looseness, or an unusual sound is a reason to stop and investigate rather than force the part.
Attachment points deserve special attention because their location and purpose may differ by harness design. Do not assume that every ring or loop is approved for every connection. Confirm the allowable configuration in the product instructions and employer’s work plan. An attachment point that is suitable for one function may not be suitable for another, and a harness alone does not establish the required clearance or rescue arrangement.
Inspect the lanyard, lifeline, connector, anchorage device, and any energy-absorbing element using their own instructions. For example, a cross-arm anchorage strap must be evaluated as an anchorage component, not treated as part of the harness inspection. Likewise, a self-retracting line cable has separate use, inspection, and compatibility considerations.
Call to discuss fall-protection equipment
What conditions mean a harness should be taken out of service?
Remove the harness from use when inspection finds damage, a malfunction, unreadable identity information needed to confirm the equipment, or any condition that falls outside the manufacturer’s acceptance criteria. Also follow the maker’s procedures after a fall-arrest event or other incident that may have loaded the equipment. Do not assume that a harness is safe because damage is hard to see.
Mark and segregate questionable equipment so another worker cannot select it by mistake. Document what was observed and the disposition. Do not attempt improvised repairs, cleaning, or alteration; use only methods expressly allowed by the manufacturer. Replace equipment when required by its instructions or the employer’s program.
A practical quarantine process has three parts. First, the inspector stops use and places the harness in a clearly controlled location. Second, the record identifies the item and explains why it was held. Third, an authorized person decides whether the equipment can be evaluated, repaired through an approved channel, or permanently removed. A harness should not return to a shared storage rack merely because no one has yet decided what to do with it.
For a consistent program, keep inspection records tied to an identifiable harness, date, inspector, findings, and decision. The record should make it clear which equipment is available and which has been quarantined. A log is useful only if workers can access it before use and the process prevents an unapproved item from returning to service.
How should teams document and control inspection results?
A checklist should lead to a clear decision, not just create paperwork. Give each harness a practical identifier that can be matched to its record without relying on memory. The form can include the model, manufacturer, serial or other identifying information available on the equipment, inspection date, inspector, work area, findings, and disposition. If the manufacturer supplies a form, use it or adapt it without deleting required fields.
Define who may complete each kind of inspection and who may authorize a disposition. A worker may perform the required pre-use check, while a designated competent person may handle the periodic review required by the employer’s program. The process should also explain where failed equipment goes, how it is marked, and who confirms that it is repaired only by an authorized method or removed permanently.
Use records to identify recurring problems, not to create a false sense of security. If several harnesses show the same type of abrasion, review the work area, storage method, routing of connectors, and handling practices. If inspections are frequently left incomplete, find out whether the form is too long, the equipment is difficult to identify, or responsibility is unclear. Correcting the process can prevent the same defect from appearing on the next inspection.
Storage is part of control. Keep harnesses away from direct sunlight, moisture, sharp edges, heat, chemicals, unauthorized modifications, and objects that could crush or contaminate webbing. Inspect equipment after storage or transport conditions that could affect it. A clean storage location cannot restore damaged equipment, but it can reduce preventable deterioration and make status easier to see.
When equipment is shared, control the handoff. The next user should be able to tell which harness was inspected, whether it passed, and whether any restrictions apply. If equipment moves between sites, send its identification and inspection record with it or make the record available through the employer’s approved system. A checklist that stays in one office may not protect a worker who cannot verify the equipment’s status in the field.
How do fit, task, and system compatibility affect the choice?
Inspection cannot correct a poor equipment selection. Buyers should identify the work-at-height hazard, the intended system, the user population, and relevant environmental conditions before ordering. Consider whether workers need particular adjustment features, whether clothing or other PPE affects fit, and how equipment will be stored and inspected.
Review the product documentation for the intended application, sizing, compatible connectors, limitations, and care. Employers should ensure workers know how to put on and adjust the harness and how it connects to the selected system. Where the job uses a specific lifeline or anchorage arrangement, check the full configuration rather than treating the harness as a standalone solution.
Fit is more than choosing a nominal size. The harness should be adjusted according to its instructions, with straps routed correctly and closures secured. The wearer should be able to move as the task requires without leaving loose, twisted, or misrouted straps. Clothing layers, tools, and other PPE can affect adjustment, so evaluate the configuration workers will actually use rather than fitting only over a light shirt in a training room.
Task conditions also shape the buying decision. A worker climbing, positioning, accessing a roof, working near an edge, or entering a restricted area may need a different system configuration and work plan. Consider anchor location, potential swing, available clearance, rescue access, and the possibility of sharp edges or environmental exposure. The checklist confirms the selected equipment’s condition; it does not decide whether the work method itself is acceptable.
SafetyCompany.com distributes fall-protection equipment from established manufacturers. Buyers comparing harnesses can review the FallTech Journeyman full-body harness alongside the manufacturer’s use and inspection information, and compare connection components such as a cross-arm anchorage strap only where suitable for the planned system.
Which compliance checks belong in a buyer’s process?
Match the equipment and its use to the applicable OSHA requirements and relevant consensus standards specified for the work. Confirm the product’s markings and documentation rather than inferring compliance from appearance or a generic listing. The OSHA harness inspection guidance emphasizes legible identification and warnings; consult current regulations, manufacturer instructions, and your organization’s competent safety professionals for the complete requirements applicable to your situation.
Compliance review should ask practical questions. Can the employer show which instructions apply to the model in use? Does the inspection process identify a person responsible for each check? Is failed equipment physically controlled? Are workers trained to recognize a stop-use condition? Does the selected system address the task’s anchorage, clearance, swing-fall, and rescue considerations? These questions connect purchasing records with field use.
Keep the inspection checklist practical. Assign responsibility, define when checks occur, specify what counts as a failure, and explain how to quarantine and report equipment. Train workers not to use equipment with uncertain status. Review the procedure when the manufacturer changes instructions, the work changes, or an incident reveals a gap.
Do not use a product page, a checklist, or a label as the only compliance evidence. Product information helps a buyer compare a model’s intended features and limitations, while the employer’s program determines how the equipment is selected, issued, inspected, trained on, and controlled. When a requirement is unclear, pause the purchase or use decision until the responsible safety professional has resolved it.
How can a team put the checklist into practice?
A useful implementation follows the equipment through its working life:
- Before purchase: Document the hazard, task, user needs, required system, and product limitations.
- At receipt: Check the item and documentation, capture its identifying information, and store it according to instructions.
- Before use: Have the user inspect the harness and associated components, verify fit, and confirm the planned connection.
- During periodic review: Have the designated person complete the program’s documented inspection and resolve any concerns.
- After an event or failed check: Stop use, isolate the item, record the issue, and follow manufacturer and employer disposition procedures.
- At replacement: Remove retired equipment from circulation in a way that prevents accidental reuse, and update the records for the replacement.
Before putting the process into routine use, test it with a few harnesses from the workplace. Ask an inspector to follow the form without verbal coaching. If the person cannot locate the equipment identifier, determine the applicable disposition, or distinguish the harness check from the lifeline check, revise the form and training. This small trial can expose vague instructions before they affect a busy work area.
Use realistic examples during training. Show a harness with a legible label but a damaged strap, one with intact webbing but a malfunctioning buckle, and one that appears sound but has an uncertain history after an incident. Ask the worker to state the finding, immediate action, record entry, and person who must make the next decision. This teaches the process rather than encouraging workers to memorize a single defect list.
For a team purchasing related fall-protection equipment, Safety Company lists FallTech self-retracting line cable; confirm its intended use and compatibility with the complete system before procurement. A written process paired with equipment-specific instructions gives purchasers and workers a shared decision path.
When comparing equipment, separate product selection from acceptance after delivery. First confirm that the model fits the hazard and system. Then inspect the received item, record its identity, and verify that its documentation is available. This prevents a familiar-looking replacement from being accepted without checking whether its limitations and connection requirements match the prior item.
A buyer can also compare the cost of ownership in practical terms without reducing the decision to price. Consider whether the model can be identified easily, whether workers can adjust it consistently, whether the required instructions are available, and whether the employer can maintain records for the number of users and locations involved. A product that is difficult to issue, inspect, or control may create avoidable process problems even when its initial purchase appears convenient.
Before a new harness enters service, assign an owner for the record and an owner for field readiness. Confirm that the user has access to the instructions, knows the inspection sequence, and understands where to take questionable equipment. That final handoff turns the checklist from a purchasing document into a routine workplace control.
Compare a full-body harness for your program
Frequently Asked Questions
When should a worker inspect a harness?
Follow applicable rules, manufacturer instructions, and employer procedures. Users should perform required checks before use, and designated personnel should complete any additional periodic inspections required by the program and equipment instructions.
What should a harness inspection checklist include?
Include identification and label legibility, webbing, stitching, hardware, adjustment and fit, connection points, and the decision and recordkeeping steps. Add the specific checks required by the maker for that model.
Can damaged harness webbing be repaired?
Do not improvise a repair. Remove questionable equipment from service and follow the manufacturer’s instructions and the employer’s approved process for evaluation, repair if expressly allowed, or replacement.
Does passing inspection prove the entire fall-protection system is safe?
No. A harness inspection does not verify the anchorage, connectors, lifeline, fit, training, or suitability of the work plan. Evaluate the complete system and task under the applicable program.
What should a buyer do if the harness label cannot be read?
Do not rely on appearance or memory to identify the equipment. Isolate the harness, record the problem, and follow the employer’s procedure for manufacturer review, approved identification, or removal from service.
A repeatable inspection process helps a workplace identify questionable equipment before it is selected for a job, but every decision must follow the specific manufacturer instructions and the employer’s fall-protection procedures.
Recent Posts
-

Buying and Using Safety Harness Inspection Checklist at Work
A safety harness inspection checklist helps workplace teams identify visible damage, confirm equipme …Oct 26th 2026 -

Drum Spill Containment Pallet: a decision guide for employers
A drum spill containment pallet helps a workplace collect leaks or spills beneath stored drums inste …Oct 26th 2026 -

Trauma Kits: Selecting Emergency Response Supplies for Workplaces
A trauma kit can help a workplace prepare for severe bleeding and other serious injuries while emerg …Oct 26th 2026