
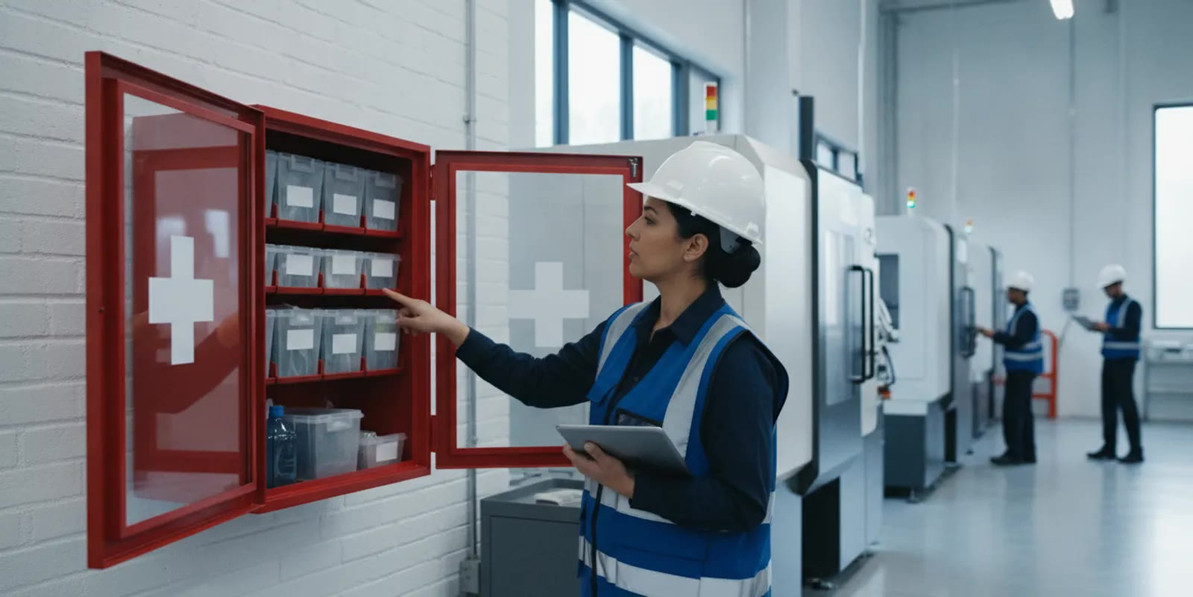
Trauma Kits: Selecting Emergency Response Supplies for Workplaces
A trauma kit can help a workplace prepare for severe bleeding and other serious injuries while emergency services are on the way. For EHS managers and emergency coordinators, choosing a trauma kit is not simply a matter of buying a bag of supplies: the decision should follow a site hazard assessment, a clear response plan, and the training available to designated responders.
Talk with a safety supply specialist
What role should a trauma kit play in a workplace plan?
A trauma kit is intended to support a defined emergency response, not replace professional medical care or a workplace first-aid program. Its contents and use should fit the hazards on site, the responders expected to reach it, and the time it may take emergency services to arrive. A kit alone does not make an area safe or ensure that a response will be effective.
Start by documenting where severe injuries could occur. Powered equipment, material handling, vehicle traffic, work at height, maintenance tasks, sharp tools, and remote work areas may present different access and response challenges. Review incident history and existing hazard assessments with the people who know the work. Then identify who is responsible for calling emergency services, retrieving supplies, meeting responders, and keeping access routes clear.
Separate trauma response supplies from routine first-aid supplies when that improves identification and access. Make sure employees can quickly distinguish the kit from other equipment. The U.S. Department of Homeland Security overview of individual officer trauma kits describes essential supplies for addressing life-threatening injuries in a field environment before certified help arrives. Workplace buyers should use that information as context, not as a universal workplace contents prescription.
Which hazards and response conditions should buyers assess?
A practical assessment considers both injury potential and response logistics. Walk the work areas at different operating times and ask:
- Which tasks or locations could involve serious bleeding or other traumatic injury?
- How many employees, contractors, and visitors may be present, and where do they work?
- Are any tasks performed outdoors, in isolated spaces, or far from a staffed reception area?
- How quickly can trained responders reach each work zone?
- Can responders reach a kit without entering an unsafe area or passing through locked doors?
- What communication method is available to summon emergency services and guide them to the incident?
- What weather, temperature, dust, moisture, vibration, or vehicle traffic could affect the kit or its route?
Consider shift coverage, language needs, changing layouts, seasonal work, and contractor access. A central kit may be visible but too far away for a remote loading area. A kit near a hazard may be difficult to access if the event blocks the route. Use the assessment to decide whether a single location is adequate or whether multiple kits are needed; do not choose a quantity based on an unsupported rule of thumb.
For example, a small fabrication area with one predictable access route may need a clearly identified kit near the work zone and a backup location elsewhere in the building. A distribution facility with several docks, vehicle routes, and multiple shifts may need a different arrangement. The question is not merely how many people work at the site. It is whether a responder can locate and reach appropriate supplies promptly from each area where a serious injury could occur.
Review applicable workplace requirements and organizational policies with the responsible safety professional. Regulatory duties can vary by industry, task, location, and the level of medical services available. Do not treat a particular kit label or a supplier's product description as proof of compliance. Keep the written rationale with the site emergency plan and revisit it when processes, staffing, or building access changes.
What supplies belong in a trauma kit?
Contents should reflect the hazards, the intended role of the kit, and what trained responders are authorized and prepared to use. Severe-bleeding response supplies are a key consideration for a trauma-focused kit. Depending on the site's response plan and product selection, buyers may evaluate items such as protective gloves, trauma dressings, gauze, and tourniquets. A product list is not a clinical protocol; selection, training, and use must follow authoritative first-aid guidance and the manufacturer's instructions.
Do not assume every kit needs the same contents. A small kit for a defined work area may differ from a larger response pack intended for a facility with multiple hazards. Verify that supplies are clearly identified, packaged for the expected environment, and suitable for storage conditions. Check expiry dates where applicable, packaging integrity, and any special handling requirements. If a kit includes items that responders are not trained or authorized to use, resolve that mismatch before deployment.
| Selection factor | Questions for the buyer | What to verify |
|---|---|---|
| Hazard coverage | Which serious injury scenarios are reasonably foreseeable? | Contents map to the site assessment and response plan. |
| Responder capability | Who may use the supplies, and what training do they have? | Supplies align with training, authorization, and current guidance. |
| Access and environment | Can responders find and reach the kit in each work area? | Packaging and storage suit the location and conditions. |
| Readiness | How will the kit be checked after use or on a schedule? | Inspection owner, records, and replenishment path are assigned. |
| Procurement continuity | Can individual items be identified and reordered? | Contents list, manufacturer information, and replacement route are available. |
For broader emergency planning, the World Health Organization's information on emergency health kits explains that standardized kits are designed for different health needs in humanitarian emergencies and disasters. That context reinforces an important buying principle: kit contents depend on the intended purpose and setting, so do not borrow a list without checking whether it fits your workplace.
A trauma kit should also be considered alongside, not instead of, other controls. Depending on the work, a response plan may reference hand protection, eye protection, protective clothing, machine guarding, lockout procedures, fall protection, and housekeeping. These controls address exposure before an injury occurs. The kit supports the response after an emergency has happened.
Where should trauma kits be placed?
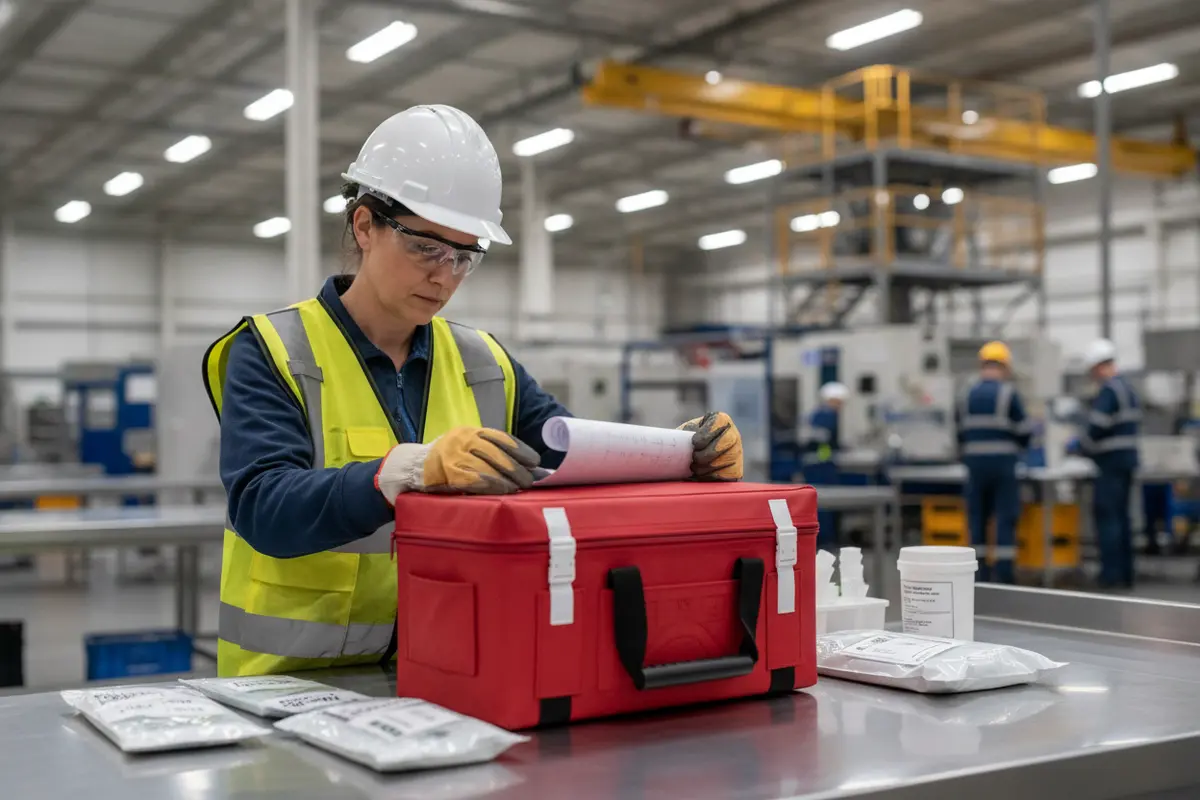
Place kits where designated responders can locate them quickly and where access remains possible during an emergency. Consider visibility, travel paths, doors and gates, equipment congestion, and the possibility that an incident could block the nearest route. Avoid placing a kit behind stored materials or inside a space that is routinely locked without an emergency access procedure.
Use consistent signage and location naming across the facility. Include kit locations on site maps, orientation materials, and emergency response instructions. If multiple buildings or work zones are involved, make sure instructions identify the relevant kit without requiring employees to search through an inventory system. Keep the area around each kit clear and inspect that condition during routine workplace checks.
Placement should also account for environmental exposure. Heat, moisture, dust, vibration, and direct sunlight may affect packaging or supply integrity. Follow product storage instructions and choose a location that balances protection with fast access. Do not place a kit in a way that encourages an untrained person to enter a hazardous area to retrieve it.
Think through the route from the likely incident point to the kit, and then from the incident to the emergency-service entry point. A route that works during a quiet shift may be blocked by pallets, temporary barriers, parked vehicles, or production equipment during normal operations. During a walk-through, ask an employee who is not part of the planning group to locate the kit using only the posted directions. Their experience can reveal unclear signs or assumptions that the plan's authors no longer notice.
Placement should match the site's hazard controls, not act as a substitute for them. For example, a kit near a maintenance area does not replace guarding, lockout procedures, fall protection, or safe work practices. Review relevant equipment and PPE programs, including fall protection equipment where applicable, as part of the broader prevention plan.
Discuss workplace emergency-response supplies
How should access and emergency escalation work?
Write a simple procedure that tells employees how to alert the response team and summon emergency services. It should identify the site address, entry point, internal location details, and who will meet responders. Include a backup communication method for noisy areas or locations with poor reception. Employees should not have to decide who to call while searching for supplies.
Clarify roles in advance. A designated person may call emergency services while another retrieves the kit and another guides responders, if staffing permits. Explain how employees should protect themselves from hazards and avoid moving into an unsafe scene. The procedure should emphasize prompt escalation for serious injuries and make clear that a kit is not a reason to delay professional medical care.
Include practical details that are easy to overlook: the facility's exact entrance, a gate or badge process, an address format that can be understood over the phone, an internal room or line number, and a backup person for each assigned role. If the workplace has several buildings, identify the building and access point rather than relying on a street address alone. Coordinate with local emergency services where appropriate to confirm how responders can reach the site and whether the facility has special access arrangements.
Post instructions where they can be found and include them in onboarding and refresher training. Use plain language, accessible formats, and relevant translations for the workforce. Review the instructions after a move, renovation, change in security procedure, or change in emergency-service access.
What training supports a reliable response?
Training should match the supplies and responsibilities in the plan. Designated responders need instruction from qualified sources on the actions they may be expected to perform, along with practice locating the kit and activating the emergency process. Other employees need to know how to report an incident, summon help, identify the kit, and avoid actions beyond their training.
Training should cover:
- How to recognize an emergency and activate the site response plan.
- How to communicate the incident location and guide emergency services.
- Where kits are placed and how to reach them safely.
- Which responders are designated and how to contact them on each shift.
- How to use only the supplies and procedures included in their training.
- How to report kit use, damage, or missing items so replenishment can begin promptly.
- How to protect personal safety and avoid entering an uncontrolled or contaminated scene.
Do not rely on a one-time orientation alone. Review training after a change in hazards, staffing, facility layout, kit contents, or response procedure. Keep records of training and ensure coverage during nights, weekends, and other operating periods. If the site depends on a small number of trained responders, plan for absence and turnover.
Use a short exercise to test both knowledge and logistics. Ask one employee to identify the reporting method, another to locate the kit, and a supervisor to explain how emergency responders would be met. Do not turn the exercise into an unplanned clinical demonstration. The objective is to identify delays, unclear roles, blocked access, or missing information and then correct those gaps through the proper training process.
How can teams inspect and replenish kits?
Assign a named role to check each kit and a backup owner. Set an inspection frequency based on site policy, manufacturer instructions, use, and environmental conditions. A consistent checklist makes it easier to spot missing, expired, damaged, or contaminated supplies and to document corrective action.
A readiness check can include:
- Confirm that the kit is in its designated location, visible, accessible, and clearly identified.
- Check seals, closures, and packaging for damage or signs of exposure.
- Review expiration dates and stock levels against the approved contents list.
- Replace used or compromised supplies promptly, following product instructions.
- Record the inspection date, findings, action taken, and responsible person.
- Confirm that the replenishment order or replacement process is complete before marking the kit ready.
Inspect after every reported use, even if the employee believes only one item was taken. Keep a contents list with the kit and maintain a defined reorder route. Avoid informal substitutions: a replacement must fit the approved plan and training, and remain appropriate for the kit's storage conditions. If a full replacement will take time, use a documented interim control, such as making the affected kit unavailable and directing staff to an alternative location.
Inventory management should include a way to identify trends. Repeated damage from moisture or missing items may signal a poor location, unclear access control, or a training gap. A kit that is repeatedly opened without a corresponding incident report may need clearer accountability or a better separation between routine first aid and trauma response supplies. Use inspection records to improve the program rather than treating checks as paperwork only.
For a broader readiness review, connect kit checks with the inspection of related supplies. For example, a facility may verify that its safety clothing and other protective equipment remain available without confusing those inventories with the trauma kit's approved contents. Separate ownership can be useful, but the emergency plan should explain how the pieces fit together.
Which purchasing checks help compare options?
Compare kits against a written specification rather than choosing by appearance or number of pieces alone. Ask suppliers for clear contents information, product instructions, storage guidance, and details on replacement items. Confirm whether supplies are sold as a complete kit or as components, and whether the contents match the response plan your organization has approved.
For each candidate, check:
- Intended use: Does the kit serve the hazards and response role identified in your assessment?
- Contents clarity: Can a buyer and designated responder identify each item and its purpose?
- Training fit: Are responders prepared and authorized to use the included supplies?
- Storage: Does the container protect contents in the intended location?
- Maintenance: Can the organization inspect, track, and replenish the contents?
- Documentation: Are instructions, labels, and manufacturer details available for review?
- Scalability: Can the same approach be adapted for additional shifts, buildings, or work zones?
For procurement teams, consistency can simplify readiness across multiple sites, but standardization should not erase differences in hazard exposure or response time. Use a common baseline where it makes sense, then document site-specific variations. Keep approvals with the safety plan and include the person responsible for ongoing inspection in the purchase decision.
Do not select a product solely because it has the largest item count or the lowest apparent cost. A larger assortment can create storage, training, and inspection questions. A compact kit may be easier to carry and position, but it may not fit the hazards or responder plan. The best comparison is the one that connects each included item to a documented need and explains how the organization will keep it ready.
SafetyCompany.com is a specialized B2B distributor of industrial safety equipment and PPE from multiple brands. Buyers can review complementary categories such as safety eyewear and hand protection as part of a wider hazard-control program, while confirming that each selection fits applicable requirements and the work performed.
How can a workplace put the decision into practice?
Use a short implementation sequence to convert the assessment into a maintained program:
- Document likely serious-injury hazards, work locations, staffing, and emergency-service access.
- Define the kit's role and the capabilities of the designated responders.
- Approve a contents specification and storage location for each work area.
- Write the alert, escalation, and responder-coordination steps.
- Train employees and confirm coverage across shifts.
- Assign inspection and backup owners, with a documented replenishment process.
- Test the plan with a walk-through or tabletop discussion.
- Review the plan after incidents, exercises, changes to work, or inspection findings.
Use a tabletop discussion or walk-through to test the plan. Ask a worker to locate the kit, describe how an incident would be reported, and identify who would meet emergency responders. Note delays, blocked routes, unclear responsibilities, and gaps in shift coverage. Correct those issues and repeat the check when the workplace changes.
A useful review produces specific actions rather than a general statement that the site is prepared. The action list might assign a person to move a kit, update a sign, add a backup responder, replace compromised packaging, revise the emergency-service entry instructions, or obtain refresher training. Give each action an owner and a completion date, then retain the record with the emergency plan.
Keep the approach practical. A well-selected kit is one component of preparedness alongside hazard prevention, first-aid arrangements, communication, training, and emergency medical care. Review the entire system periodically so that the kit remains accessible, appropriate, and ready for its intended role.
Frequently Asked Questions
Is a trauma kit the same as a general first-aid kit?
Not necessarily. A trauma kit is configured for a defined response to serious injury, while general first-aid supplies support a broader range of needs. The exact contents vary, so use the site's hazard assessment and response plan to distinguish their roles.
How many trauma kits does a workplace need?
There is no single quantity that fits every workplace. Consider the number and location of work areas, hazards, access routes, responder coverage, and time needed to reach supplies. Document why the selected placement is suitable and reassess it when conditions change.
Who should be allowed to use the kit?
Follow the organization's emergency plan, applicable requirements, and training arrangements. Designated responders should use only supplies and procedures that match their training and authorization. All employees should know how to summon help and report an incident.
How often should a trauma kit be checked?
Set a documented schedule based on policy, manufacturer instructions, use, and storage conditions. Also inspect after every reported use and whenever damage or exposure is suspected. Record findings and verify that any missing or compromised supplies are replaced.
Should kit use delay calling emergency services?
No. The workplace plan should provide for prompt emergency escalation when a serious injury occurs. A trauma kit is meant to support the response while professional help is being arranged, not to replace that help.
Get help reviewing workplace safety supplies
With hazard-based selection, clear access, trained responders, and reliable replenishment, a trauma kit can support a more organized workplace emergency response.
Recent Posts
-
Drum Spill Containment Pallet: a decision guide for employers
A drum spill containment pallet helps a workplace collect leaks or spills beneath stored drums inste …Oct 26th 2026 -

Trauma Kits: Selecting Emergency Response Supplies for Workplaces
A trauma kit can help a workplace prepare for severe bleeding and other serious injuries while emerg …Oct 26th 2026 -

Chemical Storage Cabinets for industrial work: use and compliance
Chemical storage cabinets help workplaces control access to hazardous materials and keep storage con …Oct 23rd 2026